Showing posts with label Craft. Show all posts

Friday, March 25, 2016

Easter Center Piece

How to make a simple, yet cheerful, Easter Center Piece!

Materials Needed:
Large Vase
Smaller vase or bottle (can fit within the larger with breathing room)
Easter Basket "Grass"
Easter Eggs (I used the smaller kind ones which fit better in the vase) 
Real or Fake Daffodils

I used a small bottle filled partially with water to hold up the live daffodils in the large vase. I surrounded said bottle with green Easter basket "grass" and topped with mini plastic Easter Eggs. Candy within said Easter Eggs is optional.

Viola!

Friday, October 30, 2015

Halloween Costume 2015

So for those of you who are interested, here is my "Evil Little Mermaid"/Siren Costume
Here is the skirt before adding the tulle fin:


Here it is after the tulle fin was added!


Here are the ears in production:


Here they are painted and bejeweled:


Here is my make up close:

I paired it with my black corset and the awesome pearls I got from my best friend ALICIA. 


And here is the spectacular picture from the party photo booth:


Wednesday, July 29, 2015

Pax Cosplay: Val from Table Titans


So another Cosplay I decided on was Val from Table Titans. No, she is not from a video game, but she is from a Web Comic that is an affiliate of Penny Arcade, so I feel like she will be a good choice for PAX. Here are some pictures of her.


Here she is realizing that as a Dwarf, she does in fact love a troll. 
Note the green dress with fur lining. In this rendition, I assume she has either pants or leggings on that are dark green.


War version of Val


This is how she envisions herself while she is playing DnD. I love the fur lined boots as well as the additional fur lining on the bottom of the dress. The bracers and belt look great too,


That hat though!


So I decided that I would do a version of her in her green, fur lined (both neck and bottom) dress with Brown fur cuffed boots, a brown belt, and then her little horned helm as shown in the last picture above.


I found this dress ($3) at the thrift store:


I removed the arms and cut the neck out just slightly to give it a bit more of a plunge. I then added the fur neck line and bottom ($2 for fabric). I paired it with my thick brown belt.


Here is the fabric I chose. 


Partially cuffed! 


Fully cuffed with belt option!


I then found a pair of brown boots (Dr Scholl's!) at a thrift store ($13). I took a holey pair of Husband's socks and cut out the feet (too thick of a sock for basic wear). I added a fur cuff to them and tadah! I have boots that LOOK like they are fur cuffed, but aren't so I can still use them this fall time!


I can wear them with most any boot!


Ta-dance!


Here is the start of her hat!


And here is the last of it! 

(I will add freckles with my eyeliner pencil the day I wear it.)

Looking forward to seeing how this looks all together at convention!!

Yay PAX!

Friday, July 17, 2015

Glo Run Team: ELECTRIC PINEAPPLE


So I have never done a "theme run before" let alone done a run with people I don't normally run with. You can imagine my excitement for the Glo Run that I will be joining in on in August with my Step Sister, Niece, and friend Mel.


Mel and I decided we wanted to make team shirts so we got sizes from the rest of our "team" and I got some Glow in the Dark Tulip Paint and we went to town. We knew we wanted the statement "You glow, girl" on the shirt in someway, but that didn't seem like a team name. After a glass of wine, we decided that "Electric Pineapple" was the best name ever. Thus our team name became epic.


We decided that, obviously, we needed a  glow in the dark pineapple on the back of our shirts:


Pineapples on the back!


Here is our inspiration.


Here are the shirt fronts: (In white paint we have the "You Glow, Girl!" written below the Electric Pineapple title.


Oh, the delights of DIY

Wednesday, July 15, 2015

Pax Prime Cosplay: Ellie


So Pax Prime is coming up soon and Husband and I are attending with the Daves. As I have a) never been to Seattle and b) not been to PAX Prime, I am thoroughly excited about this trip! At the last PAX Convention I attended, I cosplayed as Roxy Ritcher.  This time around, I know better. I will be cosplaying as Ellie from "The Last of Us" as well as a character from a Web Comic that is a PAX Affliate. That one will come up later.


As you can see, Ellie is a 14 year old girl who is pretty much wearing stuff you can find right now.

Fortunately, I have a pair of jeans and a black long sleeved thermal already. All I "needed" to get is a pair of black, blue, or brown Chuck Taylors (which I wanted anyway, though I ended up using my orange high tops as I already had them and Chucks are expensive), a dark green backpack, and a shirt that looked like the red shirt she wears throughout the game. The backpack easy and cheap ($13) thanks to Amazon. The shirt, on the other hand, was harder. I COULD buy it for like $25 and it wouldn't look vintagey. Why in the heck would I do that?


Thus begins the Arts and Farts and Crafts time!


First off, I found the graphic online. I printed out 3 copies on thick grade cardstock. Using an Xacto knife, I cut out all the parts that needed to be black on one, all the parts that need to be blue on another, and all the parts that needed to be yellow on the last one. Then I laminated them and cut it out again. I did that just to give the stencil a bit more firmness.


Then I hit of the thrift store and got a shirt for $1 that was close to the right color. Boom! Not $25 spent! SO I got together my paints (already hade, but they were $2.50 for the 3 colors), sponge brush ($1), an old magazine (to put in the shirt to keep the shirt from drying together) and masking tape (had). I taped a guide for my stencils so things could line up nicely and put the magazine up the shirt as a firm surface for my art work. I started with the Yellow stencil as it is the lightest color (easiest to apply color over) and the background of the palm trees.


The tape lines are for lining up my homemade stencils!


Gotta stay in the lines!
First level! Tadah!
Then I let the yellow dry completely. after a couple hours I went back and added the light blue waves.


Now on to the second color!
Waves!

After letting the blue dry, I added the black layer. Unfortunately, on my first try, my sponge brush had water in and the black lines are not crisp for the most part. I tried to dab up some moisture, but for the most part, I thought the shirt was ruined. I let it dry and tried the black layer again with a DRY sponge brush and it turned out ok. Her shirt is filthy during the game and it kinda added to the "not brand new" styling I was looking to get.

Boom, Cosplayed!


I will post some pictures of both of my Cosplays from Pax when I post pictures from said convention.


Keep it real, y'all...

Thursday, December 18, 2014

Christmas Craft: Wedding Invitation Ornament

I have seen this floating around on Pinterest and Etsy for a long time so I figured I should give it a whirl. This tutorial worked best for me except that I wrapped the strips of paper around a crochet hook instead of using the scissors to curl them. While it wasn't hard to execute, I think it has some room for improvement.

Give me MORE sparkle!
I think that I need to add some more ribbon to show off our wedding colors. I also need to add some gold glitter and to paint the top of the ornament as we used Gold (not the typical silver). Perhaps I will take out a few curly cues as you can't really see a lot of the "important" curlies due to crowding.

What do y'all think?

+++++++++++++++++++++++++++++++++++++++++++++++++++++++++++++++++

I wrote the above post and about 2 days later, I found some extra time at my friend Kimmy G's house before she cut my hair to try to improve upon it. Here is what I did:

Took out a few of the frivolous curls and then loosened a few of the more important ones in hopes to make them a bit more prominent. I added a TON more ribbon (I actually took a bit out before this picture) and some glitter into the ball. I sill need to paint the top of the ornament with Modge Podge and add glitter on it which hopefully I will get done and can add to the bottom of this post. :)


What do y'all think about the "improvements" I made on the original attempt?


Tuesday, October 7, 2014

A DIY test run before doing it with a pretty cool 12 year old...

So my niece and I have a Pinterest Board together. With me living in LA and her in Missouri, it is hard for me to keep in touch with her and stay up to date on her likes, dislikes and personality even. They just grow so darn quick! Any way, we came up with a really cool idea to try to do a couple pins while Husband and I are home visiting the families this Christmas. One pin that kept coming up was this one. While it looks SUPER cool, my brain was like: The watercolors paint will just wash out or fade super quickly. That doesn't make sense. Why would you use such a silly "dye"?

Then, thanks to A New Dress A Day post and, also this pin, I figured out a way to do it with Rit Dye (aka permanent). So my buddy Kris from How to Feed a Starving Artist came over and tried it out with me. 

She was working with a crew neck cotton t shirt while I was working with mostly cotton, partially polyester, white dress that I had been planning on giving away. Now Polyester doesn't take dye for all you never have dyed clothing before people out there. Like there is no way known to man to do such things. But I figured that since I was planning on getting rid of it any way, I might as well give it a whirl. 

So I diluted some kelly green and royal blue dye (the liquid kind) in some water, pulled out the sponge brushes, laid out some trash bags to protect the area, and then saturated the clothing that would be dyed with tap water. We wore gloves and old clothes just in case as well. then we got to work.

Here is out not well lit work space in the Car Port at my apartment.
I ended up applying the color with long strokes and puddles of color much like a Monet while she when for more of a Seurat look by flicking the color. We then let them dry outside for a day until they were completely dry.

Gotta let them dry.
I then washed them in cool water and a mild detergent rinse out any extra dye and they dried them in the machine.
My dress with long lines of color.
Kris's Shirt with flicks of color.

And here I am modeling my master piece:
I know, I look very serious.
I would say this was a very successful DIY which I look forward to do with my niece as well as do again by myself on an article of clothing or two.


Wednesday, July 30, 2014

Next time you want to stab me in the back...

An example of how a craft idea starts and ends for me:


So I saw this little guy on the great website: Think Geek

 Loved it and the realized: ooooh! I have a green cargo messanger bag already!


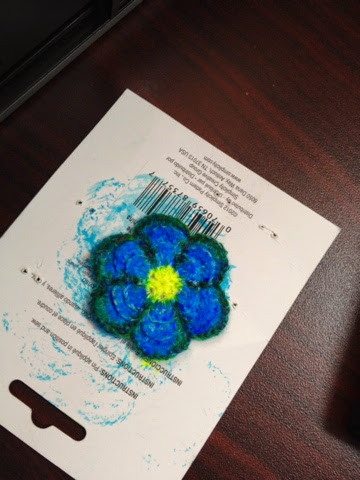
I still had a extra crocheted flower I used for my Cosplay of Kaylee, so I dolled it up.

Ta dah!

I bought the bear patch at Wondercon in April and got another heart patch at Joann's

The highlighter claimed it's territory. Le sigh.

I am very happy with the way this turned out and I have been using that that I haven't used since college much more. 

Hooray for upcycling! 

Until the next craft...


**Today's title is from Firefly: Mal: "Next time you want to stab me in the back, have the guts to do it to my face."**

Tuesday, July 29, 2014

How to Make a Cosplay: Hiccup

As you all know, I enjoyed Comic-Con 2014 this past month. I wanted to give y'all an idea of what it took to take an idea from spark in my mind to reality.

An Example


First off: I cut my hair for Wigs for Kids in late March and ended up loving it. After a couple days, I suddenly realized that most of my cosplays were created around what I could do with my long brown hair. "Uh, Oh" I thought... I figured that my hair would grow out enough for Captain Jackie Harkness and Roxy Richter has a wig. I figured I could do lady Mario again, but I wanted to pull out something new this year. So I brainstormed and though of Hiccup from How to Train Your Dragon (thanks to best friend whose favorite movie is said film). 

This is the picture I used for inspiration/a guide.
First off, I started hitting the thrift stores. I found a long sleeved, olive tunicish shirt for $6 (50% off day so $3). On another trip, I found boots for $9 (40% off so let's say $5). Unfortunately, the boots are size 8s. I wear size 6s at most normally. So an insert or two, plus an extra pair of socks were needed to wear them. I then hit up Joann's and got the fur for $14 (30% off so $10), lining for $4, and light brown felt for $3. Then came the hard part...construction: 

Using tissue paper, I created the vest pattern.
Using chalk, I outlined the vest on the pricey fur fabric.

I had a sash belt which I attached the felt to in order to make the belt.

The boot cuff was sewn to the sock to keep it in place while walking the Convention floor.
I used olive oil to dye the boots a different color (there was a stain on right toe that needed covering up).

COST

Shirt - $3
Pants - Already owned
Boots - $5
Felt - $3
Fur - $10
Lining - $4

TIME

Shirt (30 minutes)
Hemming slits cut- 20 minutes
Adding strings - 10 minutes

Pants (10 minutes)
Adding lace up detail to side - 10 minutes

Vest (3 hours)
Perfecting Pattern - 45 minutes
Cutting and basting lining for initial example- 30 minutes
Cutting and pinning fur to lining - 30 minutes
Sewing Vest together - 1 hour 15 minutes

Boots (20 minutes - active work)
Dying boots a darker color - 20 minutes

Socks/Cuffs (40 Minutes)
Cutting and designing pattern - 10 minutes
Sewing and hemming fur to socks - 25 minutes

Belt (20 minutes)
Cut and pin felt to belt - 10 minutes 
Sewing felt to sash belt - 10 minutes 


Total Cost - $25 dollars / Total Time 5 hours

So the main costume was a deal when it came to cost and, though the time frame was about what I expected, I am very happy with my first sewing project with my mother's machine.


Horned Helm and Shield 

A lesson in paper mache.


I thought everything was going super until Bro Bro pointed out that I didn't have a Horned Helm. 
Just look at that thing...how can I compete with that?
Thanks to Pinterest, I gathered some decent ideas of how to do a Paper Mache helmet. Most suggested using a wig head form thing or a balloon for the base. I didn't have either at home so I got experimental and made head form from tinfoil, duct tape, and gaffers tape. 

Now the aliens can't get into my brain!
I paper mached a skull cap, for all intends and purposes, from my super awesome head form, letting the firt layer dry atop the form itself to keep the right shape. I then gave it 2 more layers (allowing drying time in between each layer) of paper mache as well as a layer of Mod Podge Outdoor sealer stuff to ensure that it would with stand a day of being worn at Con and all the bumps and sweat it would undergo.

So Much Hot Glue!

I then crafted horn outlines with cardboard and, using gaffers tape again (thanks Husband and your career in lighting), I filled them out with newspaper. I then added 2 layers of paper mache (again, allowing drying time in between each layer) around each horn as well as a layer of Mod Podge Outdoor sealer stuff and then attached the horns to my skull cap.

Then, I hot glued the horns on, holding each horn in place while the hot glue cooled. After the horns were hot glued on, I paper mached around them at the base to secure them extra. Using cardboard, I made the rim/form on the armor on the helm.


Metal Casing...aka cardboard.

I then paper mached over the form and then hot glued rope around then base of the horns and paper mached over it to give the feeling of mounting for them. I then painted the heck out of the helm and sealed it again with Mod Podge and then added felt in the inside of the hat to keep it comfy. 

Making it work...


Check out this stuff!

I also made a shield. I used 4 layers of cardboard, glued together with wood glue and then pressed for several hours with heavy books. I then paper mached 3 layers (focusing on making the edge smooth and look like one piece) as well as a layer of Mod Podge Outdoor sealer stuff. 

DJ helped me do the outline.

 Primed it white, drew the design, and painted in with several coats of acrylic paint and, again, Mod Podge sealed it up

Looking good!
For the hand/arm holds, I covered cardboard with fabric, form arm loops out of them, then hot glued the holds to the back of the shield. I am pretty stoked with how it has come out even though I decided to not lug it around the Con.

I let things dry in the Bathroom. What?

There will hopefully be a photo shoot for this cosplay in August with Kris. More photos to come.:)