Showing posts with label Pork. Show all posts

Wednesday, February 3, 2016

Slow Cooker Apple Cinnamon Pork Lion


It was my mother in love's (MiL) birthday recently. She normally does all the cooking and such for any sort of birthday celebration for the family, so Husband and I insisted that we at least make the entrée. Little brother brought a couple of Gooey Looey Gooey Butter Cakes (AMAZEBALLS, seriously, try them!) and MiL ended up making a salad because she is super good and them and felt bad that I was cooking when I had to work all day. I try to explain to her the beauty of a slow cooker and I think that is the only reason she agreed to it either way.


For family dinner when I am feeding 6 people, I typically go for something that is less protein based so that it will keep cost down. This dish, though, has a perfect amount protein for the price thanks to pork being less that $4/lb and it being on sale at Shop and Save early that week!


Slow Cooker Apple Cinnamon Pork Loin
Ingredients
1lb pork loin (I used a 3.75 pound loin)
2 tablespoons olive oil
2 apples, one diced and one sliced (I used a 5, 2 sliced the rest cubed)
1 large sweet potato (I used a 4, diced)
1 red onion (I left this out because Little Brother doesn't do onion)
1 tablespoon honey
1/2 tablespoon cinnamon
1 teaspoon salt
1/2 teaspoon pepper
Instructions
  1. Season pork loin with 1/2 teaspoon salt and 1/4 teaspoon pepper. Heat oil in a skillet over medium-high heat. Sear the pork for 2-3 minutes per side until browned.
  2. Place diced sweet potato, one diced apple, and diced onion in the bottom of the slow cooker. Season with remaining salt and pepper.
  3. Make slits in the pork loin and stuff with the other sliced apple. Transfer to slow cooker and sprinkle the entire mix with cinnamon and drizzle with honey.
  4. Cook on low 7-8 hours. (Mine cooked for 10 hours or so due to the larger amount of meat and my work schedule in general with commute)


Pork!

Potatoes and apples!


Until next time...cook it up!

Wednesday, April 29, 2015

Easy Peasy Cassoulet (sorta)

Not a tradition French Cassoulet, but rather similar to the Creole version, I decided to make this dish for two reasons. Italian Spicy Sausage was on super sale and I had a can of Great Northern Beans and Tomatos at home. AKA this meal that fed me 4 different Lunches at work and 3 dinners in the evening before we moved cost all of $5.

BOOM!

You see, sometimes going to the grocery store without a set idea of what to make really works out. Don't get me wrong, I am a HUGE believer and mapping out recipes and meal plans. It saves my sanity (and wallet) more often than not. In this case though, it worked out that I was checking out the "clearance" meat section. Educate yourself on the signs of food aging to know you aren't getting something that has already gone bad and proceed with your best judgement. I find I "win" at this situation about twice a month or so.

We are getting settled in here in St Louis okay now that we have moved. I am not sure how often I will be cooking now that I am sharing a kitchen, but I will attempt to keep posting regularly as this time of transition gets shaken down.

Cat's Easy Cassoulet (sorta)
Ingredients
1 package of spicy Italian sausage (5 links)
1/2 an onion
1 can of petite diced tomato
1 can of great northern beans
Directions
Brown sausage and drain off grease.
Add onion and allow to soften.
Add tomatoes and beans and allow to heat through.
Serve as is or with a side salad, if desired.

Vitamin C, fiber, protein, and fat.
This turned out to be a fine litttle meal for Husband and myself. I could eat it as it is low carb and Husband liked it as well. It all worked out perfectly for a meal to get rid of stuff in the pantry and to nibble on through out the move process.

Friday, April 24, 2015

We now return you to your regularly scheduled blog posts..BFMH: Italian Eggs

So we have now arrived at the In-laws'/loves' house. No time to make anything at this point so I leave you with something that Husband made me for ME because he is excellent. He normally has to be 

Italian Eggs:
First he saute'd some onions 
Then he scramble an Egg with the Onion
Then he top with Mozzarella Cheese and Pasta Sauce


Super simple, but nothing like I have seen before. It was really yummy. If you have left overs from when you made that lasagna, do this for the following morning's breakfast. 

Wednesday, April 1, 2015

Quick Lunch Kielbasa and Quinoa Bowl

With the preparations of moving, my whole family being in town, and the basic business of our lives together, Husband and I have mastered what we consider a quick no stress meal without resorting to "heat up" meals.

This was a quick meal I came up with last week that I wanted to share with y'all.

Quick Lunch Kielbasa and Quinoa Bowl
Ingredients
2 tablespoons of Olive Oil
1/2 an onion, white or yellow
1/2 of a bell pepper, green or orange
Salt and pepper
2 teaspoons of Dry Ground Mustard
1/4 lb of Kielbasa, fully cooked, sliced
1 cup of Quinoa, red and cooked (I used some left over)
Method
Heat olive oil in a saucepan over medium heat.
Add Onion and Bell Pepper, salt and pepper to taste.
Allow to soften, about 5-8 minutes.
Add Dry Mustard, stirring well to combine it with the sweat of the onion and bell pepper as the residual olive oil.
Add sausage and quinoa and cook till heated through.
Spoon into a bowl and chow down.


This turned out very good. Simple and yum. I highly suggest it as an option.

Monday, February 23, 2015

BFMH: Ham and Cheese Rosti

Rosti are pretty much just the Swiss's version of hashbrowns crossed with a pancake.

Ham and Cheese Rosti
Ingredients
1 large egg
1 cup(s) diced ham, (about 5 ounces)
1 cup(s) shredded part-skim Jarlsberg , or Swiss cheese, divided
1 shallot,  minced
1 teaspoon(s) chopped fresh rosemary , or 1/4 teaspoon dried
1/2 teaspoon(s) freshly ground pepper
1/4 teaspoon(s) salt
4 cup(s) frozen hash brown potatoes
2 tablespoon(s) extra-virgin olive oil,  divided
Directions
Beat egg in a large bowl. Stir in ham, 1/2 cup cheese, shallot, rosemary, pepper and salt. Add frozen potatoes and stir to combine.
Heat 1 tablespoon oil in a large nonstick skillet over medium heat. Pat the potato mixture into an even round in the pan. Cover and cook until browned and crispy on the bottom, 4 to 6 minutes.
Remove the pan from the heat. Place a rimless baking sheet on top. Wearing oven mitts, grasp the pan and baking sheet together and carefully invert, unmolding the rosti onto the baking sheet. Wipe out any browned bits from the pan. Return it to the heat and add the remaining 1 tablespoon oil. Slide the rosti back into the pan. Top with the remaining 1/2 cup cheese, cover and cook the second side until crispy and browned, 4 to 6 minutes. Slide onto a platter, cut into wedges and serve.


This is what it is suppose to look like.

This is how mine looked.

It ended up being eaten like this.
While this was a sarcastic "NAILED IT" post for Pinterest, the idea was good and the flavor even better. I assume (?) I need more oil, a more non stick pan, a hotter pre heat of oil, a lower preheat or oil, another egg in the mix, add some flour......I have no clue how to fix this at the moment. I was so bummed out it didn't work. Both Husband and I were very excited about this dish, so it was a downer when it didn't turn out perfectly, though, the  aforementioned flavor was super duper. I will have to do some research and figure out how to fix it.

Any ideas how to turn this Failed It into a Nailed It?

Wednesday, January 7, 2015

Garlic Lime Pork...quick dinner DONE

So I marinated some pork steaks is soy sauce, lime juice, and garlic about 3 days ago. Thanks to the awesomeness of my food saver, I knew everything would be ok if it sat in the fridge for a bit. 

I got home this evening and was informed that we needed to eat dinner before we headed out. I knew I wanted to get a bit gussied up for hand so I needed to make dinner quick. Good thing I had a quick cook vegetable and ready to grill meat! HUZZAH!

Pulled out the George Foreman, plopped the meat on for about 7 minutes, and cooked up some asparagus. Thinking back o it, I wish I had just grilled the asparagus and saved one more dish for clean up. Oh, well. 

I poured a bit of the marinade in with the veg. wasn't needed, but was still good.
Boom, Pork Steaked. A little burnt, I know...
This turned out pretty well. I think that I will use this marinade concoction again. The pork was nicely flavored and tender thanks to the extended marinating time. Dinner was cooked and on the table in about 10 minutes. I will need to remember this trick in the future, like when I am a busy mom or something.

Until next time...

Monday, December 29, 2014

BFMH: Baked Eggs in Ham Cups

This was super easy and a good way to prep for the New Year and resolutions.

Baked Egg Cups
12 Eggs
12 thin slices of deli ham (round)
1/2 Cup of your favorite cheese (I used Parmesan)
1/2 Cup diced scallions
Fresh cracked Sea Salt and Pepper
Preheat the oven to 400.  Spray a muffin tin with cooking spray.  Lay a piece of ham in each hole creating a little ham cup.  Crack one egg into each hole and sprinkle with salt and pepper.
Bake the eggs for about 12 minutes…until the white is firm and the yolk is still nice and runny.
Carefully remove each egg from the muffin tin and top with grated cheese and scallions.  Serve hot!  Yield: 12

I forgot scallions, purposely, but I did. I simply can't get behind buying them that often. I can't wait till I have a garden and can grow them. That will be a great thing.

I put cheese on before it went into the oven.

Egg and cheese become one.

Perfection.

Anyway, this is my favorite "Low Carb Muffin Tin Breakfast" to date. A good amount of protein, very little carb, and easy to make in a morning. I highly suggest this for those people on Low Carb diets.

Thursday, November 6, 2014

What to make with Sauerkraut leftovers...Vegan, Vegetarian, and Meat Eater Options

After WHOtoberfest, we had a grip of left over sauerkraut.  ( know that was last month, but it has taken awhile to figure out how to use all of it. So I came up with 3 ideas of what to use it up with and made them over the last few weeks. I hope one of my German readers will find this helpful.

OPTION 1

VEGAN OPTION - as long as your Sauerkraut is Vegan, of course
Pierogi (Potato and Mushroom Sauerkraut) with a little help
Ingredients
For the caramelized onions:
1/4 cup canola oil
2 pounds sweet onions (Vidalia or Walla Walla), diced medium

For the potato filling:
1 1/2 pounds Yukon Gold potatoes, peeled and sliced, cut into 3/4-inch chunks
1/4 cup canola oil
1 small onion, finely chopped
1/2 teaspoon salt
1/2 teaspoon pepper

For the mushroom sauerkraut filling:
4 tablespoons nonhydrogenated margarine (or 1/4 cup canola oil and 1/4 teaspoon salt)
10 ounces mushrooms, sliced (about 3 cups)
2 cups sauerkraut
1/4 teaspoon pepper

For the dough:
1 cup warm water
3 tablespoons canola oil
3 cups all-purpose flour, divided, plus a little extra for sprinkling
3/4 teaspoon salt

For serving:
Applesauce

Preparation
Make the Caramelized Onions
Preheat a heavy-bottomed skillet, preferably cast iron, over low heat. Add the oil and the onions and toss the onions to coat. Cover and cook for 20 minutes, leaving a little gap for steam to escape. Stir occasionally, every 5 minutes or so. Onions should turn amber, but not burn, although a couple of darker spots are fine.
Remove the cover and turn the heat up just a bit, to a medium setting. Stir often for 10 more minutes. Onions should become a darker amber, and some of the moisture should evaporate.
Make the Potato Filling
In a medium-size pot, cover potatoes in water. Place a lid on the pot and bring to a boil. Once boiling, cook for about 20 more minutes or until potatoes are easily pierced with a fork.
Meanwhile, in a large pan, sauté the onions in oil over medium heat for about 7 minutes. Turn the heat off but continue to stir occasionally because they could still burn from the hot pan. When the potatoes are done boiling, drain them well and add them to the pan with the onions. Just mash them right in there with a potato masher; that way you are sure to get all the oil, plus you save a dish. Add the salt and pepper. Make sure potatoes are mashed well and fluffy. Set aside to cool a bit.
Make the Mushroom Sauerkraut Filling
You know I don't usually advise cooking with margarine, but I really love it with the mushrooms here, I think because growing up the mushrooms I ate were really buttery. Anyway, this filling is really simple. In a large skillet, melt the margarine over medium-high heat. Add the mushrooms and sauté for about 7 minutes, until the mushrooms are soft.
Before adding the sauerkraut to the pan, give it a squeeze over the sink to get out as much water as you can. It's important to do this so that your pierogi don't get all wet. You'll need to add the sauerkraut to the pan a cup at a time. Add to the pan and cook for about 10 minutes, cooking out any excess water. Season with the pepper. The filling shouldn't look dry (a small amount of water is okay), but you shouldn't be able to slosh around in it in rain boots.
Make the Dough
This is really the brunt of the work in this recipe. If you're like me, you have limited counter space and so rolling out dough can be a hassle. I make the dough last because the mess becomes much more manageable when you don't have to prep on the counter afterwards. It also gives your filling some time to cool. So make sure you clean up after your filling making and get someone to do the dishes for you. I find that a serene counter makes all the difference in dough making.
Pour the water and oil into a large bowl. Add 2 cups of the flour and the salt, keeping one cup aside. Use a fork to stir the flour in, and as it starts to come together, use your hands to knead until a loose dough forms (about 3 minutes).
Cutting the Dough Circles
Sprinkle your counter with flour, then turn the dough out onto it and knead. Add the reserved cup of flour a little bit at a time, working it into the dough, until it is very smooth and elastic, about 10 minutes. If it's too sticky, you can add a little bit more fl our and knead it in, sometimes up to 1/4 cup extra. Conversely, if you get a good-feeling, smooth, elastic dough with less than the extra cup of fl our, then that's okay, too.
Now we roll the dough out, and also bring a salted pot of water to boil—the largest pot you've got—for boiling the pierogi.
Divide the dough in half and make sure your counter is clean and sprinkled with a dusting of flour to prevent sticking. Roll half the dough out to about 1/16 of an inch thick, which is to say, very thin but not see-through. I roll it into an 18 x 10-inch rectangle, but as long as you have the thinness going, the shape doesn't matter so much. Sprinkle the top with a light dusting of flour.
Using a 3-inch (7 ½ cm) round cookie cutter (they can be made larger if you like) carefully cut out circles, trying not to deform the circles of dough too much, although this dough is easy to work with and “correctable”. I lifted up the circles, 2 or 3 at a time, and made sure they were on a floured section of the table before trying to fill and fold. With floured fingertips, I tapped each circle a bit to stretch out the circle.
Constructing and Cooking the Peirogies
Place a mounded teaspoon of filling just off of the center of each round of dough.
Now, gently pull the wider half over the mound of filling and place the side edge-to-edge with the side with the dough. Nith the edges matching/meeting, just press with the side of your floured index finger, pulling the dough and pressing to seal. The edge should be a bit less than a finger’s-width. This will also keep the edge from being too thick. Be very careful not to rip the dough covering the filling.
As you form the pieorgi, 1, 2 or at the most 3 at a time, place them on a floured or lined and floured plate or baking sheet until you are ready to cook.
Bring a pot of water to a boil. Once it is boiling, lower a bit to a healthy simmer and drop in the pieorgi just 6 or 7 at a time (they shouldn’t crowd or overlap in the pan). Allow to cook for 6 to 7 minutes. They should float to the top and, when lifted out with a slotted spoon, should look puffy. Cook the rest in batches. Place on towels to drain.
To fry, simply heat olive oil or a mixture of butter and olive oil in a skillet and fry the pierogi for a few minutes per side, in batches, again, not overcrowding. They should be golden on each side.

A filling of tasty-savory-ness


While this appears to be a lot of work, remember that this is for left over sauerkraut. I already have caramelized onions in my sauerkraut so I skipped a few steps. I mashed a couple potatoes, sauteed some mushrooms, combined 'taters and 'shrooms with the onions and kraut, and then prepped some dough.


hmm golden browness...
These turned out VERY Nicely. while I wish that I could have stuffed with them with more deliciousness, I was happy with how they came out as were all the people at the Halloween Poker Party. I made their kitchen a bit smoky unfortunately (I am not use to the electric stove top), but the food was yummy enough that I was forgiven. I would say that I thought these were a little more work than I prefer to give, but they were worth it.

OPTION 2

VEGETARIAN OPTION  - as long as your Sauerkraut is Vegetarian, of course
Fried Sauerkraut Cakes <Optional with Kielbasa>
Ingredients
1 (1-pound) package sauerkraut (not canned), rinsed and drained well (2 3/4 cups)
2 large eggs, lightly beaten
1/3 cup all-purpose flour
1/2 cup chopped scallion greens
3/4 teaspoon salt
1/2 teaspoon black pepper
1/2 to 3/4 cup vegetable oil
1 pound smoked beef and pork kielbasa, cut crosswise into 1/2-inch slices <For NonVegetarians>
Accompaniment: warm applesauce
Preparation
Preheat oven to 250°F.
Pat sauerkraut dry between paper towels to remove as much moisture as possible, then transfer to a bowl and stir in eggs, flour, scallion greens, salt, and pepper until combined.
Heat 1/4 inch oil in a 12-inch heavy skillet over moderate heat until hot but not smoking. Fill a 1/4-cup measure three-fourths full with sauerkraut mixture, then turn out into oil, using a fork to release, and flatten to 3 1/2 inches in diameter with fork. Form 2 more cakes in skillet, then fry, turning over once, until golden, about 4 minutes total. Transfer cakes with a slotted spatula to paper towels to drain. Keep cakes warm on a rack set in a shallow baking pan in oven. Fry more cakes in same manner with remaining mixture.
Brown kielbasa in 2 batches in oil remaining in skillet over moderate heat, turning, 2 minutes per batch, then transfer to paper towels to drain. Serve cakes topped with kielbasa.

Fry up!

Not a GREAT photo...

I was very on the fence of if this was going to be good or not. Even though I already know that I like my sauerkraut with the addition of apples and bacon, I was worried about the moisture level etc. Fortunately, they were perfect. I had to add a little extra flour to soak up the moisture, and had to be rather gentle with the flipping as I didn't want to break them. I garnished it with applesauce (and sour cream, if I had had some). I HIGHLY suggest these as a leftover sauerkraut option, both easy and yummy.


OPTION 3

MEAT EATERS OPTION
Reuben Sandwiches
This is pretty simple an rather obvious option:
Toasted Rye Bread
Leftover Sauerkraut
Sliced Swiss Cheese
Thousand Island Dressing

I don't like Rye Bread so we got a nice sourdough instead. Also, there is no reason for us to own a bottle of Thousand Island Dressing, but I lucked out by a couple co workers going to In and Out and I asked them to grab a couple pack of extra sauce (which is pretty much Thousand Island Dressing).


This sandwich was perfect to welcome Husband home from a long day at work with a beer, strawberries, and Arrow. This is a "duh" option for using up left over Sauerkraut.

Until the next amountage of leftovers needs to be used up...


Monday, November 3, 2014

BFMH: Breakfast Taquitos

These little beauties turned out super and incredibly filling!

Breakfast Taquitos
INGREDIENTS
10-12 corn tortillas, softened
3 large eggs, scrambled
6 ounces spicy Italian sausage, crumbled
3 oz of cream cheese
1 cup shredded sharp cheddar cheese
INSTRUCTIONS
Preheat oven to 425 degrees Fahrenheit. Line a baking sheet with parchment paper; set aside.
Working one at a time, transfer tortilla to a work surface; place eggs, sausage, cream cheese and cheddar cheese in the center of each wrapper. Bring the bottom edge of the tortilla tightly over the filling, rolling from bottom to top until the top of the tortilla is reached. Repeat with remaining tortilla and filling. Place taquitos seam side down onto prepared baking sheet and bake until taquitos are crisp and cheese has melted, about 12-15 minutes. Serve immediately.

Nummies!

Yes, that IS Sourcefed Animated on the IPad!

I combined everything then put it into the tortilla.

Husband and I were both so full from this breakfast that we ended up sharing lunch. I will most definitely be making these bad boys again in the future.


Monday, September 29, 2014

BFMH: Breakfast Quesadillas

So Hopeforbeer came up to visit me a few weeks ago! How lucky am I?!? Since she came to visit, I figured that I should of, course, make a

Breakfast Quesadillas
makes two quesadillas
Ingredients:
3 large flour tortillas
4 eggs, lightly beaten with a pinch of salt and a splash of milk
1/3 cup of red onion finely chopped
1 cup raw baby spinach
6 pork sausages (I used Uncle John's), cooked and roughly chopped
1 tbsp butter, divided
3/4 cup of Mexi Cheese Shredded
Salsa, Greek yogurt or sour cream, hot sauce to taste
Directions:
Scramble the eggs in a small skillet with half of the butter. Once scrambled, scoop eggs into a small bowl and set aside.
Heat up a large skillet and drop the rest of the butter in. Lay a tortilla flat down then sprinkle with a third of the eggs, sausage bits, onion, cheese, and spinach. fold and press the tortilla in half. Cook quesadilla until golden brown on both sides. Repeat with remaining ingredients.
Slice into quarters and serve.
Time: 15 minutes


The beginnings of the stuffing process..
Folded and frying.
Fried to a nice, crisp outside with gooey insides full of flavor.

This turned out perfectly. Super yummy, a little less food than a full out breakfast burrito, and incredibly personalizable. I was actually treated to this dish a couple days after hopeforbeer left as Husband wanted to make me breakfast. Absolutely NO complaints here! trust me, DO THIS.


Thursday, August 28, 2014

A pizza roll for people over the age of 24...

I love pizza rolls. Specially the Tortoni's Brand kind that you aren't totally sure what all is in there, but hey are so good that you burn your mouth, but that only slows you down a little....

Sorry, that got a little away from me. I like junk food is all I'm trying to say. Now that I am 30, I must think about setting good examples for my nieces and nephew as well as my someday maybe children. Thus I decided to try to figure out some way of making Junk Food a little healthier/more nutritional. Pizza is never going to be on of those things, but making it myself, will keep it more wholesome and less preservativey.

These pizza rolls aren't quite as bad (health wise or mouth burny wise) as the store brought ones. Like I said before, they are made by me so I know what is making it in there and can control that. Also, because of the bake and slice-i-ness of it, the cheese and sauce have a little bit of time to cool and not continue to bubble and boil within the packaging.

Pizza Roll

Ingredients:
1 thing of Pizza dough (either homemade or from a maker you trust)
2 teaspoons olive oil
2/3 cup pizza sauce (homemade or store-bought)
ground basil, to taste
garlic powder, to taste
1 cup shredded mozzarella cheese (I had cheese sticks so that I what I used)
60-65 pepperoni slices (you can sub this for veggies if you are vegetarian)
1/3 cup grated parmesan cheese
1/2 cup yellow cornmeal
Method:
Preheat oven to 350F degrees. Line two large baking sheets with silicone baking mats (preferred for ease) or parchment paper.
Divide dough into 2 and roll out dough onto a lightly floured surface or directly on silicone baking mats. I found it easiest to roll directly on the silicone mat-lined baking sheets. Roll each into a large rectangle, about 9 by 12 inches.
To prevent the filling from making your pizza rolls soggy, brush the tops lightly with 1 teaspoon olive oil each. Using your fingers, push dents into the surface of the dough rectangles to prevent bubbling. See photo above for visual. Spread 1/3 cup pizza sauce on top of each dough rectangle. Sprinkle each lightly with ground basil and garlic powder.
Sprinkle 1/2 cup shredded mozzarella evenly over sauce. Add up to 2 Tablespoons more shredded cheese per dough rectangle if you'd like. Top the cheese with pepperoni slices. About 30ish slices per dough rectangle. Carefully roll dough rectangles into long tight logs. Place logs onto 1 prepared baking sheet, seam side down, and place baking sheet in the refrigerator to chill for at least 25 minutes. Read above for why chilling is so important.
Remove from the refrigerator and cut each log into 12 1-inch slices. Pour cornmeal into a plate or into a bowl. Dip the bottom of each roll into cornmeal and place 12 on each baking sheet, cornmeal side down. Sprinkle the tops of the rolls with parmesan cheese.
Bake each batch for 20 minutes or until the sides are lightly browned. Allow to cool for 5 minutes and serve with extra pizza sauce for dipping. Pizza rolls should be enjoyed immediately, though they may be covered tightly and stored for 1 day in the refrigerator. If you plan to make them ahead, make them up until the point where you chill the logs in the refrigerator (be sure to cover them, though). Then the next day, bake as directed.

I didn't add any sauce on mine.

...extra cheeeeeeeze...

I baked mine like this verses slicing them first.

Pizza Sauce is for dipping.
These are rich and delish. I feel like the way I did these was a bit easier than cutting and dipping into corn meal. Either way, these are much more filling than you would think, but just as yummy and addictive as Pizza Rolls should be.

Friday, August 15, 2014

BFMH: Croque Monsieur

So I am behind a little bit on breakfasts....well, I WASN'T and then I realized Husband is out of town this weekend. so I made him 2 different breakfast sandwiches, face off style. The winner will be made (and devoured) again sometime next week for his eating pleasure. To set the stage, I will introduce the first contestant. Croque-Monsieur. The history of this sandwich dates back to 1910, when it first arrived on a cafe menu in Paris. The Croque part means "to crunch" while Monsieur means (said it with me) "Mister". While a ham and cheese sandwich is not quite breakfast, the Bechamel sauce that is served over it, makes it a rich and yummy treat at any part of the day.

There are many different types of variations of this sandwich. The most well known variation would be the the Croque-Madame, which is the same sandwich, just with a poached or fried egg on top. Other variations include:
Croque Provencal - with tomato
Croque Auvergnat - Bleu d'Auvergne cheese
Croque Gagnet - with Gouda and andouille sausage
Croque Norvegien - with smoked ham instead of ham
Croque Tartiflette - with sliced potatoes and Reblochon Cheese
Croque Bolognese/Croque Boum-Boum - With Bolognese sauce
Croque Senor - with tomato salsa
Croque Hawaiian - with a slice of Pineapple
and lastly (but, yes, least)
Croque McDo - the McDonald's version of hte sandwich that is sold throughout France.

I opted to make the most traditional sandwich without too many bells and whistles on it. Mainly, to find out Husband's true feelings on a sandwich I ate many of while in France back in 1995.

Croque-Monsieur

Ingredients
2 tablespoons unsalted butter
3 tablespoons all-purpose flour
2 cups hot milk
1 teaspoon kosher salt
1/2 teaspoon freshly ground black pepper
Pinch nutmeg
12 ounces Gruyere, grated (5 cups)
1/2 cup freshly grated Parmesan
16 slices white sandwich bread, crusts removed
Dijon mustard
8 ounces baked Virginia ham, sliced but not paper thin
Directions
Preheat the oven to 400 degrees F.
Melt the butter over low heat in a small saucepan and add the flour all at once, stirring with a wooden spoon for 2 minutes. Slowly pour the hot milk into the butter–flour mixture and cook, whisking constantly, until the sauce is thickened. Off the heat add the salt, pepper, nutmeg, 1/2 cup grated Gruyere, and the Parmesan and set aside.
To toast the bread, place the slices on 2 baking sheets and bake for 5 minutes. Turn each slice and bake for another 2 minutes, until toasted.
Lightly brush half the toasted breads with mustard, add a slice of ham to each, and sprinkle with half the remaining Gruyere. Top with another piece of toasted bread. Slather the tops with the cheese sauce, sprinkle with the remaining Gruyere, and bake the sandwiches for 5 minutes. Turn on the broiler and broil for 3 to 5 minutes, or until the topping is bubbly and lightly browned. Serve hot.


Croque looks funny before oven time.

This called to have it under the brioler for 3 - 5 mins. 2-3 minutes was fine for mine, but I noticed that AFTER I cooked it up. I saved it and the sauce just bubbled so I scrapped off the burnt part.

I will give the taste review on Monday with the other contestant in this competition.

Yes, this is a LOT of work for a sandwich. But that is why French food is held at such a higher level. Even their sandwiches take 3 times the amount of work that most American Dishes might. Save a Monte Cristo. Which, I'm just saying, I am totally gonna make soon thanks to making this sandwich.

Let see how this French delicacy (not really delicate at all though) holds up against my favorite flavors: Balsamic Spinach, Tomato, Egg, and Cheese Sanddwich!

Tuesday, July 22, 2014

Crockpot Ribs

After an excellent weekend away, I was sent home with some pork ribs...

How, oh, how to prepare such ribs....?

TO THE PINTEREST! 

And thus I found this pin and the original post.

Crock Pot Coca-Cola Baby Back Ribs Recipe!
INGREDIENTS:
1 rack Pork Baby Back Ribs
1 can Coca-Cola
Salt and Pepper
1/2 bottle Barbecue Sauce

METHOD:
Salt and pepper ribs on both sides.
Wrap ribs around outside of crock pot.
Pour Coke over ribs and cook for 8-10 hours on low.
Cover a oven safe pan with aluminum foil.
The meat will be falling off the bones, so carefully transfer the ribs to the foil lined pan (meaty side up).
Cover ribs with barbecue sauce and place under broiler until sauce starts to sizzle and caramelize.
Remove from oven and serve.


Tuesday, July 15, 2014

Golabki, Golumpki, Gawumpki (spelling?)

There are several Polish delicacies which I have heard both Husband and Kimmy G talk about regularly: Pierogi, Chrusciki, and Golabki. God help me, I have no clue if I spelled any of those correctly....

While some might think that stuffed cabbage rolls are the epitome of comfort food, my Germanic/Scottish heritage raised by a Francophile can’t bring itself to agree.

Typically the cabbage rolls are stuffed with pork and beef mixed with rice and are then cooked in the oven or on the stove until tender.

The Polish call them gołąbki (gaw-WOHMP-kee), which literally means "little pigeons."

There are two popular sauces are used to complete the savory wrapped bundles.

One sauce I found (but didn’t make) is pretty much beef stock gravy which you cook the bundles in and then garnish with a bit of sour cream. Sounds pretty nice, but Husband expressed that his Bapcia (Babcia is the universally acknowledged spelling) made hers with the tomato sauce. So I looked for a recipe following that line of thinking.

Here is the recipe from the best looking pin I found:

Gołąbki {Polish Cabbage Rolls}
 Ingredients
1 head of cabbage, cored
1 tablespoon vegetable oil
1 medium onion, chopped
2 garlic cloves, minced
1 teaspoon cinnamon
¼ teaspoon nutmeg
16 oz. tomato sauce
2 tablespoons brown sugar
2 tablespoons red wine vinegar
1 lb. lean ground beef (or half it with ground Pork)
1 cup cooked rice (I used brown)
1 egg, beaten
1 teaspoon salt
½ teaspoon black pepper
Method:
Bring a large pot of salted water to a boil. Boil the entire head of cabbage for 12 to 15 minutes or until tender enough for the leaves to be pulled off and rolled. Drain the cabbage and allow to cool while you prepare the filling and sauce.
Heat the oil in a skillet over medium heat. Cook the onions about 5 minutes, or until tender and translucent. Add the garlic, cinnamon and nutmeg and cook for 1 minute more. Remove half of the onion mixture to a large bowl. Stir the tomato sauce, brown sugar and vinegar into the skillet with the remaining onion mixture stir together. Simmer over low heat while you prepare the filling and the rolls, stirring occasionally.
Add the ground beef, rice, egg, salt, and pepper to the onion in the bowl and mix with a fork or your hands. On a cutting board, peel off 12 or more cabbage leaves and cut out the hard stem from each leaf in such a way that you end up with two long leafs for rolling. Place about 2 tablespoons of the beef mixture in the middle of each cabbage leaf half and roll up. As you roll them, place them seam side down in a 9×13 baking dish sprayed with oil. Pour sauce on top, cover with foil, and bake at 350 degrees F for 45 minutes or until cooked through.
Makes 20 gołąbki.


Per gołąbek (cabbage roll): 100 calories; 6 g fat; 7 g carbohydrates; 1 g fiber; 5 g protein; 3 Points Plus


While this turned out very well, Husband did give me some pointers as did the oh so Polish, Kimmy G! It was agreed upon that it needed less rice and cinnamon/nutmeg and more sauce to good in as well as more cabbage leaves. I must have gotten a small head of cabbage because I only got about 10 bundles put together prettily. It was agreed by all that while is lacked this or that and needed more the A and B, it was good all in all. I ended up getting Bapcia's "recipe" (from the memory of Aunt Carol) in the long run and it turned out Bapcia did a gravy style of it as she didn't care for the tomato sauce. It was agreed between Husband and I that our family version of the Polish recipe would most certainly be with the tomato sauce.

Here's to new memories and traditions for our new family!

Until the next meal...


Friday, July 11, 2014

And there's an "I" in meat pie. Anagram of meat is team... I don't knowwhat he's talking about.

I have made all sorts of of different meat "pies": Cottage (beef), Shepherd's (lamb), and now I have made Swineherder's Pie (pork)!

The recipe is simple enough.
Ingredients
2 cups vegetable stock
2 carrots, diced
1 cup peas
1 yellow squash, diced
3 cups shredded pork
Salt and Pepper
4 potatoes, boiled and mashed with a bit of salt and cream
1/2 cup cheddar cheese  
Method
Combine carrot, peas, squash, and pork together and season with salt and pepper.
Simmer with stock over medium heat for 8 -10 minutes. 
Put in casserole dish.
Spread mashed potatoes over pork and veggies.
Sprinkle cheese over potatoes and, using a fork, create a pleasing pattern in the taters.
Bake at 350 degrees for 45 minutes.


You can, of course, add what ever vegetable strikes your fancy for this concoction, but I stick to the squash and starchy veg.


This was ok. I think nest time about adding some corn, some spices like basil or thyme, maybe some garlic and onion into the veg portion. Maybe some sour cream into the mash, too. It just needed and little something else.

Our guest, Gill, who came over to play Magic with us, was very pleased with it. Now I don't know it that is because I made food or if it had to do with the subtly in flavor, but he assured me that it was an good meal.

Until the next meal....


**Today's title is from Shaun of the Dead: Shaun: As Mr. Sloan always says, there is no "I" in team, but there is an "I" in pie. And there's an "I" in meat pie. Anagram of meat is team... I don't know what he's talking about. **

Monday, June 30, 2014

BFMH: Peas and Eggs: A Spanish Breakfast

While I was pinning away, looking for breakfast ideas, I pinned something quite accidentally. It was a breakfast idea, but it was link to a Spanish website. While I could guess at what it was going to consist of, I am truly grateful for the magical Google Translate.

The wonders of Google Translate made it so that I could try this Spanish breakfast as I have been calling it.

It is excessively easy:
Scrambled up some eggs.
Add some peas and onion.
Add ham if your desire.
Enjoy the scramble.

Photo care of the pin, I deleted my picture accidentally.


While this dish was insanely easy, it was different, but delectable, and hit the spot.

So go ahead! pull out the frozen peas from the freezer and go for it!

Monday, June 23, 2014

BFMH: Egg in a Pepper

This was about as simple as it gets as well as lowfat and low carb. I had everything in the fridge it easy and "inexpensive" (aka no unforeseen costs).

Peppers and Eggs
Ingredients
1 Egg for every 2 Peppers
3 Peppers per person
2 links of Andouille sausage
Method
Cut and seed peppers lengthwise (or the best way for them to not tip their contents out).


Husband really liked this, but for some reason I didn't care for it. I was completely underwhelmed by it, but, as husband enjoyed it, it was a success.

Wednesday, June 11, 2014

I don't like to generalize...

Way back when, I made an excellent dish for fine people who assisted when our move. That was well before I had even started this blog. So I remade it this week for my work "husband" and his fiance.

Mexican Quiche
Ingredients
1/2 cup milk
1/2 cup sour cream (sub Greek Yogurt or additional milk)
1/2 cup chopped green chili (or some from a can o’Anaheim chilies)                                                            
6 eggs
1 cup shredded cheese – Mexican blend is my choice
1/2 cup chopped ham or sausage (leave off for vegetarian)
1 can of diced tomatoes 
4 corn tortillas
butter or margarine
Method:
Preheat oven to 375 degrees
Lightly spread butter over the bottom and sides of a 9 by 13 baking dish. Put 2 tortillas on each side and a half of one at each end.  Use a little more butter to sort of paste together the edges of the tortillas to seal the bottom layer.
In a mixing bowl, beat the 6 eggs. Blend the milk and sour cream in a blender until smooth and combine with the eggs. Fold in all the cheese. Just so you know, you can substitute the sour cream and milk if needed by using just 1 cup milk. Pour the mixture into your tortilla crust.
Carefully sprinkle the green chili (decrease chili, or only put on part if some are not as fond of spicy) and meat into the quiche, arranging it however you want depending on who likes what. The one shown above has chili throughout, but the ham is only in half of it.  Bake for 40 minutes or until eggs are set.


I love this dish. It is easy and delish. You can add meat and onions as well.

Until the next meal...

**Today's title is from Ezra Koenig: I don't like to generalize, but I've had nothing but bad experiences with Mexican food in Europe.**

Saturday, May 31, 2014

BFMH: Egg in an Avocado with Carnitas Hash

This week's BFMH is one that Husband requested a few months back, but I kept putting it off due to the astronomical cost of avocados lately. I finally gave up this week and just brought one.

Egg in an Avocado
Preheat oven to 425 degrees F (220 degrees C).
Place each avocado half in a ramekin. Crack 1 egg into each avocado half; season with salt, black pepper, and cayenne pepper. Place ramekins on a baking sheet.
Bake in the preheated oven until entire egg is cooked through, about 15 minutes. (Sprinkle with bacon if you want.)

Carnitas Hash as a side dish:
Ingredients
Potato - diced
Onion and Bell Peppers - diced
Olive Oil
Method
Saute everything together and season with salt and pepper.


I made my hash the day ahead with a different dish and then put it below the avocado while it was baking to heat it again.

Make more space next time!

No where in any of the Pins that I had for this recipe did I see something that said to scoop out a bit of the avocado...I would suggest that as most of the white ended up in the Hash below. It is merely an aesthetic concern as the flavors were all still present and excellent.

Not super pretty, but pretty yummy.

Husband and I both enjoyed our breakfasts and I think that if the price of avocados comes down, it will be made again. Try it out sometime y'all, just make room for the whole egg. With the scrapped out avocado, make a small side of my Guacamole!  

Saturday, May 24, 2014

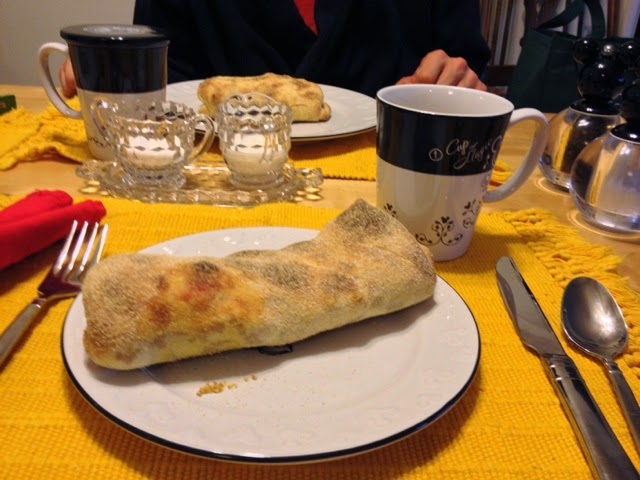
BFMH: Breakfast Stromboli (or a Breakfast Hot Pocket)

This breakfast turned out super. Like, so good I will make it for our someday maybe children and they, too, will love it. It turned out to be a pretty decently easy breakfast as well.

Breakfast Stromboli (or a Breakfast Hot Pocket)
Needed:
1 package of Farmer John Pork breakfast sausage (Sub Mushrooms and Onion for Vegetarian version)
1/2 a bell pepper
5 eggs
1/2 cup of evaporated milk
1 package of ready made pizza dough
1/2 cup of cornmeal
4 slices of cheese (I used 2% Cheddar)
Method
Crumble and brown the sausage and add bell pepper when nearly done to soften.
Whisk eggs together with evaporated milk
Scramble eggs
Roll out pizza dough using the cornmeal as the non sticky flour stuff
Cut dough in fourths and lay a slice of cheese in the center, top with sausage, pepper and egg.
roll like a burrito and bake at 450 degrees for 9-11 minutes on a pizza stone.


I am sure you ware wondering about 2 different choices: the evaporated milk vs regular milk and the cornmeal vs flour.


Evaporated milk vs Regular milk
Using evaporated gives the same sort of creamy effect as regular milk would but cuts down significantly on the moisture/liquidyness within the bready wrap. I will probably try this trick next with my breakfast burritios.


Cornmeal vs Flour
The thicker grainyness of the cornmeal work better as keeping the sticky dough lifted off the baking surface. It also, like the evaporated milk, cuts down on high levels of liquidyness inside the wrap.


Seriously, yummy, and when Husband and I ate the left over one the following morning, the reheat was just as yummy. All I am thinking is how much I need to learn to make my own pizza dough so I can make these  on a weekly basis and not as a special occasion only dish.

HOORAY BREAKFASTS!