Showing posts with label Dessert. Show all posts

Friday, September 28, 2018

It has been a hot minute

Hail Friends!

It has been a hot minute or 7 since I posted last and for that, I cannot apologize. I have a very different workload than I once did between being a wife, a mother of a now 2 year, a pregnant lady yet again (due in November), working full time with a long enough commute to make it that I can't pop home during the day, and being in graduate school. Plus, attempting to have a social calendar as well as running my own Dungeons and Dragons campaign from time to time, I am amazed I am on my feet come 6 pm most days.

That all being said, I have been cooking occasionally and I thought I should share with you a current hit in my household.

We picked apples at my Aunt's house (she has MacIntosh trees) and I thought this was the best use of the apples and also being able to share with our D&D crew (one of whom is vegan) was an added bonus.

Vegan Apple Crisp
Ingredients
FOR THE FILLING
6 medium apples, diced into chunks (about 6 1/2 cups worth)
5 teaspoons lemon juice
1/4 cup sugar
1/4 cup brown sugar
3/4 teaspoon cinnamon
1/4 teaspoon sea salt
2 tablespoons cornstarch
FOR THE TOPPING
3/4 cup brown sugar
1/2 cup whole wheat flour
3/4 cup rolled oats
1/4 teaspoon sea salt
1/2 cup coconut oil, melted
1/2 cup of pecans, pieces 
Directions
Cut apples into chunks and place in a large bowl
Add remaining filling ingredients to the bowl (lemon juice, sugar, cinnamon, sea salt, and cornstarch) and toss with the apples until well combined
In a separate bowl, combine all ingredients for the topping. Melt the coconut oil before adding to the mixture. The topping should resemble wet sand once mixed well.
Pour apple mixture into a pan (I used a 9" pie dish)
Cover evenly with the topping
Bake at 350 for 55-60 minutes, or until the apples are bubbly and the top starts to brown
Allow to cool/rest for 15-20 minutes before serving

Serve alone or with (vegan) ice cream to keep it vegan!


Thursday, March 29, 2018

Edible Eggless Cookie Dough

So this is all the rage right now, not gonna make you sick raw cookie dough. So I figured I should give it a try. This is the recipe I used: 

Edible Eggless Cookie Dough Recipe
This Edible Eggless Cookie Dough Recipe is safe to eat raw! There's no flour, we use homemade oat flour instead, & is free of eggs! Edible cookie dough for the win!
Ingredients
1 stick (1/2 cup) unsalted butter softened to room temperature
1/3 cup granulated sugar
1/2 cup brown sugar packed
1 teaspoon vanilla extract
2 tablespoons milk room temperature
1 1/2 cup homemade oat flour directions below (you'll need about 2 cups old fashioned oats)
1/2 teaspoon salt
2/3 cups chocolate chips
Instructions
Cream together softened butter, granulated sugar, brown sugar, vanilla, and milk until fluffy, about 60 seconds.
Beat in oat flour and salt.
Once combined, stir in chocolate chips.
Serve immediately or store in the fridge, covered, for later!
Recipe Notes
Homemade Oat Flour:
Place about 2 cups old fashioned oats in food processor. Process until it resembles fine flour. Measure out 1 and 1/2 cups and proceed with recipe above!
If you're gluten free, make sure your oats are, too!

This turned out VERY rich and quite yummy, but nothing like the stuff you can buy from the food truck. If anyone can get their hands on that recipe Half Baked uses, pass it along to me!.

Wednesday, May 17, 2017

Lactation Cookies

Do not try to double this recipe unless you have one of those big KitchenAids.

The Miracle Milk Cookie
Ingredients:
2 Tbsp. flaxseed meal {or linseed can be used} 
4 Tbsp. water
1 cup butter, softened
1 cup white sugar
1 cup brown sugar
2 large eggs
1 tsp. vanilla
2 cups all purpose flour (Note: I've also used self-rising flour for this recipe, if you use self-rising flour do not add baking soda or salt to the recipe)
1 tsp. baking soda
1 tsp. salt
2-6 Tbsp. Brewer’s Yeast {This is the active ingredient, so the more the better. I used about 3 Tbsp. and it worked great!}
3 cups quick oats
1 cup chocolate chips
Directions:
1.    Preheat oven to 375ºF. 
2.    Mix together the flaxseed and water and let sit for 5 minutes.
3.    Meanwhile, cream together the butter and sugars.
4.    Add eggs one at a time and mix well.
5.    Add flaxseed mix and vanilla.
6.    In a medium bowl, combine together flour, baking soda, salt, Brewer’s Yeast, and oats.
7.    Add to the butter mixture 1/2 cup at a time.
8.    Once the dough is mixed together well, add chocolate chips.

9.    Bake for 9-11 minutes.

Friday, March 18, 2016

Irish Apple Cake with Custard Sauce


This cake as delicious. I will probably make this for many St Patrick's Days to come it was SO yummy.


Irish Apple Cake with Custard Sauce
Ingredients
Cake
3 cups all-purpose flour
1 Tbsp baking powder
1/2 tsp salt
1/4 tsp of each ground ginger, nutmeg & allspice
3/4 cup unsalted butter, cold, diced into small pieces
1 cup + 2 Tbsp granulated sugar, divided
1 1/2 lbs granny smith apples (about 5 medium)
3/4 cup milk
2 large eggs
1 tsp vanilla extract
1/2 tsp ground cinnamon
Custard Sauce
1 1/2 cups whole milk
1 pinch salt
6 large egg yolks
1/2 cup granulated sugar
1 1/2 tsp vanilla extract
Directions
For the cake:
Preheat oven to 375 degrees. Butter and flour a 9-inch springform pan, set aside.
In a very large mixing bowl whisk together flour, baking powder, salt, ginger, nutmeg and allspice for 20 seconds. Add butter pieces and rub into mixture using fingertips until it resembles fine crumbs. Stir in 1 cup sugar.
Peel apples, slice in half, core and stem, then laying apples on flat side, slice downward into pieces slightly less than 1/4-inch thick, then dice those pieces into smaller chunks (about 2 or 3 chunks depending on size of apples). Add apples to flour mixture and toss well to evenly coat, while working to separate any apples that may be stuck together.
In a separate mixing bowl, whisk together milk, eggs and vanilla until well combined. Pour milk mixture over apple/flour mixture and using clean hands, toss just until combined (batter will be slightly lumpy but that's fine, just don't over-mix).
Pour batter into prepared baking dish and spread into an even layer. In a small bowl stir together remaining 2 Tbsp sugar plus 1/2 tsp cinnamon, sprinkle evenly over cake. Bake in preheated oven 45 - 50 minutes until toothpick inserted into center comes out clean. Cool about 5 minutes on a wire rack then remove ring from springform pan and allow cake to cool to desired temperature. Serve warm drizzled with warm custard sauce (or cool with cold custard sauce, however you prefer).
For the custard sauce:
Heat milk with a pinch of salt over medium heat, and bring just to a light boil (keep an eye on it and remove from burner if needed before letting it rapidly boil). Meanwhile, add egg yolks and sugar to a medium mixing bowl and whisk vigorously until pale and fluffy, about 2 - 3 minutes (alternately you can do this with an electric hand mixer on high speed for about 30 seconds if you don't want to mix that long by hand). Reduce burner to medium-low heat, then while whisking egg yolk mixture, slowly pour in 1/2 cup hot milk mixture. Then, while whisking milk in saucepan slowly pour egg yolk mixture into saucepan. Cook mixture, whisking constantly, until thickened and mixture coats the back of a wooden spoon, about 3 - 4 minutes (be careful not to over-heat it, if you cook it too long or don't whisk well the eggs will curdle). Immediately pour into a glass container, stir in vanilla and whisk about 20 seconds to cool slightly, then cover with plastic wrap pressing against surface to prevent a skin from forming. Serve warm over cake (or cold). Store in refrigerator in an airtight container.


I ran out of regular sugar so I used Brown and Powdered on top for dusting.


With Custard (or without), this was a win!

Wednesday, March 16, 2016

Irish Potato Candy


As everyone should be aware, St Patrick's Day is coming up! So I found this wonderful and easy (though a bit time consuming) candy you can make a few days ahead of time for all your St Patty's Party needs.

Irish Potato Candy:
1⁄4 cup softened butter
4 ounces cream cheese, softened
1 teaspoon vanilla extract
1 (16 ounce) package confectioners' sugar
7 ounces sweetened flaked coconut (2 1/2 cups)
1 tablespoon ground cinnamon
Directions
NOTE: Be sure to use regular cream cheese, not whipped or reduced fat type.
In a large bowl, cream together the butter and cream cheese.
Add vanilla and confectioners' sugar.
Beat until mixture forms a ball.
Stir in coconut with a spoon.
Roll the mixture between your hands to form small potato-shaped candies or roll into small balls.
Place cinnamon in a shallow dish and roll the balls in it.
Place the balls on a cookie sheet and chill for about 1 hour or until firm.
If you prefer "dirtier potatoes" roll the candy a second time after they have chilled.
Alternatively dip in melted chocolate for Easter eggs.

Ready for the Fridge!
I don't care for Cinnamon enough for that to be the only thing on the outside of these candies, so I halves the cinnamon with cocoa. Unfortunately, I only have unsweetened cocoa, it would have been better with sweetened cocoa.

This look like little mini potatoes (or moose turds, depending on who you ask) and they taste is very nice. I think that next time I make them, I will pulse the coconut in the food processer a little bit to ensure a nice potato shape without any wild "roots" popping out as well as use a sweetened cocoa with a little less cinnamon.


Here is one in all its glory!

Until next time, cook it up!


Monday, February 15, 2016

Valentine's Day Strawberries


For Valentine's day I requested that we make (not buy) chocolate covered strawberries. It was super easy in the double boiler that I got for Christmas and they turned out very yummy. All I did was melt some semi sweet chips in the double boiler, dipped a strawberry, placed on parchment paper lined baking sheet, refrigerate until consumption.
Here are some pictures.
NOM NOM NOM


Much berry, such chocolate.


Friday, November 27, 2015

Snickers Salad

So I tried something new this year:


Snickers Salad
Ingredients:
1 quart of Home Made Whipped Cream (Cool Whip is fine, too)
20 fun size Snickers, unwrapped and quartered (you can use any size, just make them small pieces)
2 granny smith apples, diced small
1 container of apple Caramel, softened
Method:
Fold the whipped cream, Snickers, and apples together. Place in serving bowl. Drizzle with Caramel and have is out for personal garnish as well.


Not pretty, but super yummy.


There are lots of different recipes of this floating around. some with butterscotch pudding or cheesecake pudding. I thought that the lightly sweetened Whipped Cream balanced the sweetness of the Caramel and candy well. It was also a great use of the left over Halloween Candy we had from the month prior. I highly suggest this concoction if you happen to have the ingredients at home.

Friday, November 13, 2015

Maman's Burnt Sugar Pound Cake

Yesterday marked 71 years since my mother was born. While she has been gone now for 16 years of my 31 years of life, her spirit still holds strong and true in the memories of those who loved her. I had the great joy of eating dinner with two dear friends of hers, and mine, on Tuesday of this week and reminisced about her vivacious and generous personality. I have also been going through boxes of her belongings that were kept for my brothers and me. I have been on an emotional rollercoaster due to the things contained in said boxes. My older brother's wife asked about Mom's Pound Cake recipe, I went searching in the recipe boxes and books that I had inherited. There was only one pounds cake recipe that I found so I assume that it must be the one Bro Bro like so much.


Here is how you make it:


It turned out pretty dang good. There was too much cake there to do much with so I ended up throwing out about a 5th of the cake 2 weeks later, but it was super good. I will make it for a party, not for regular everyday dessert.


Friday, July 31, 2015

An attempt at Peach Cobbler

Nothing says summer to my husband, Pigeon, more than peaches. So I had him get some from Eckert's (an amazing orchard in the area) and I attempted a peach cobbler.


Easy Peach Cobbler

Ingredients
1/2 cup unsalted butter
1 cup all-purpose flour
2 cups sugar, divided
1 tablespoon baking powder
Pinch of salt
1 cup milk
4 cups fresh peach slices
1 tablespoon lemon juice
Ground cinnamon or nutmeg (optional)
Preparation
Melt butter in a 13- x 9-inch baking dish.
Combine flour, 1 cup sugar, baking powder, and salt; add milk, stirring just until dry ingredients are moistened. Pour batter over butter (do not stir).
Bring remaining 1 cup sugar, peach slices, and lemon juice to a boil over high heat, stirring constantly; pour over batter (do not stir). Sprinkle with cinnamon, if desired.
Bake at 375° for 40 to 45 minutes or until golden brown. Serve cobbler warm or cool.


I really liked the flavor the cobbler got thanks to be cooked in the cast iron. While I have not yet found the perfect cobbler recipe, I am enjoying attempting different ones as it is a relatively easy dish that makes Husband most glad.


Until next time...Cook it up!

Friday, June 26, 2015

Coconut Rice Pudding with Mango and Coconut Chicken


I have made this Chicken before by simply taking my friend chicken recipe and throwing in some coconut flakes with the flour. It is a big hit with all the Golomski family and an even bigger hit with me.


CoCo for Coconut Chicken!
So I tried a little some new by cooking some rice with water and coconut milk and adding some white sugar as well to make it a sweet dessert. I let it cool after it was soft enough.

bubble bubble toil and trouble!
I garnish it with a few slices of mango and it turn out to be a perfect, hot day treat.

Mangos make everything awesome


Until next time...Cook it up!

Thursday, April 30, 2015

A few things I made for our Open House: Sweets

This things I made for our Open House that were sweet:
Smores Bar
Ingredients:
8 tablespoons (1 stick) unsalted butter, plus more for the pan 


1 cup all-purpose flour, spooned and leveled 
2 teaspoons baking powder 
1 teaspoon kosher salt 
1 1/2 cups packed light brown sugar 
2 teaspoons pure vanilla extract 
2 large eggs 
1 cup pecans or walnuts, coarsely chopped 
4 graham crackers, broken into small pieces 
1 cup miniature marshmallows 
3/4 cup semisweet chocolate chips
Method:
Preheat oven to 350° F. Line the bottom and sides of a 9-by-13-inch baking pan with aluminum foil; butter the foil. In a medium bowl, whisk together the flour, baking powder, and salt.
In a medium saucepan, melt the butter over low heat. Remove the pan from heat and stir in the brown sugar and vanilla. Whisk in the eggs until combined. Mix in the flour mixture until combined, then the pecans.
Spread the flour-nut mixture in the prepared pan and bake until golden and a toothpick inserted in the center comes out clean, 20 to 25 minutes. Sprinkle with the graham crackers, marshmallows, and chocolate chips and bake until the marshmallows are pale golden, 7 to 8 minutes more. Set the pan on a wire rack and let cool completely. Lift the blondies out of the pan, using the foil to help, and cut into 24 bars.
Storage suggestion: Keep the blondies at room temperature, between sheets of wax paper in an airtight container, for up to 5 days.

These didn't cut easily, nor did the marshmallow stick well to the blondie portion. Next time I will try to have everything incorporated verses layered.

Gooey Cake Mix Cookies
Ingredients:
Yellow Cake Box Mix
1/2 cup butter
1/2 tsp. vanilla
1 8 oz. Cream Cheese bar
1 egg
powdered sugar
Instructions:
In a mixer, beat butter, vanilla, egg and cream cheese until light and fluffy. Mix in cake mix a little at a time. Chill for 30 minutes in fridge. When chilled roll into balls and dip in powdered sugar. Bake at 350 for 10-12 minutes, be sure to not over bake. Remove form baking sheet and cool on a wire rack.

These were a HUGE HIT. considering how easy they are, it makes sense to make them over and over again.

Chocolate Eclair Ice Box Cake
3 cups cold milk
2 small pkgs. instant french vanilla pudding mix
1 - 8 ozs. frozen whipped topping, thawed
1 pkg. (14.4 ozs) graham crackers
1 - 16 ozs. can chocolate frosting
In a large bowl, whisk milk and pudding mixes for 2 minutes.  Let stand for 2 minutes or until soft-set.  Fold in whipped topping.  In a 9" X 13" X 2" dish, layer a third of the graham crackers and half of the pudding mixture.  Repeat layers.  Top with remaining graham crackers.  Refrigerate for at least 1 hour.
Spoon frosting (I rarely use all of it) into a microwave-safe bowl.  Cover and microwave on high for 15 - 20 seconds or until softened, stirring once.  Spread over graham crackers.  Chill 12-24 hours before serving.

This was too messy slash was too hard to grab and go for an open house. While it was super yummy, only 3 pieces got eaten that evening. I will make this again for a sit down family event.


Friday, March 13, 2015

Cravings: Hot Chocolate From Scratch Chocolate Off!

Husband LOVES hot chocolate. He had the most amazing Hot Chocolate at the Disneyland so I decided that I obviously needed to perfect a recipe for him.

Here he is sipping some.

1) Belgium Hot Chocolate <This was the winner in Round 2>
Ingredients:
2 cups Whole Milk
1 cup Half & Half
4 oz. real Belgium Bittersweet Chocolate 

2 oz. good quality Milk chocolate
1/4 tsp. sea salt
1/2 tsp. ground cinnamon
Method:
Melt chocolate slowly in milk. Add Half & Half. Heat, but do not bring to a boil. Whisk until frothy. Europeans don't have as sweet as tooth as Americans. If needed, add a Tbsp of sugar.


2) Italian Hot Chocolate <This was the runner up in Round 1>
Ingredients:
2 1/4 cups Whole Milk (or less fat milk will work as well)
1/2 cup unsweetened cocoa powder
1/4 cup plus 2 to 3 Tbsp sugar (adjust to your taste)
1 1/2 Tbsp. cornstarch
1/8 tsp. sea salt
Method:
Whisk all ingredients in pot over low heat until blended. Continue to whisk occasionally until mixture comes to a boil, let simmer for a minute until thick. Mixture will create a 'skin', so either serve right away or place plastic wrap over mixture and store in refrigerator until ready to reheat and serve.


3) Mexican Hot Chocolate
Ingredients:
2 cups Whole Milk (or less fat milk will work as well)
1 cup half & half
6 Tbsp brown sugar
4 1/2 oz. bittersweet good quality chocolate (recommended: American made Scharffen Berger)

1/2 tsp pure vanilla extract (Mexican of course!)
1/8 tsp ground Nutmeg
Cayenne Pepper (to taste...start with a dash and go from there. I like a pinch or two)

Cinnamon Sticks (if you don't use these, then add 1/8 tsp of ground Cinnamon, but don't you both as it will be too cinnamon-ee.

Method:
Melt chocolate slowly in milk until melted, whisking occasionally. Heat, but don't boil. Add rest of the ingredients. Taste and adjust seasoning if needed.


4) Christina’s Italian-Style Hot Chocolate
(makes 2 servings)
12 ounces 2% or whole milk (plus 2 or 3 tbsps)
4 tbsp very good quality unsweetened cocoa
3 tsp corn starch
2 oz very good quality dark or bittersweet chocolate
3 tsp sugar (more or less, to taste)
To Prepare:
Place cocoa powder and corn starch in small mixing bowl.
Add 2 or 3 tablespoons milk and mix the cocoa and corn starch into a smooth and slightly runny paste (add more milk or water if needed.)
Next, heat milk in small saucepan over medium low heat, and add the chocolate.
Whisk to mix in chocolate once it begins to melt.
When the milk is starting to get hot, pour in the cocoa mixture, while whisking constantly.
Now its time to sweeten the cocoa-add the desired amount of sugar.
Go ahead and taste it to see if it needs more sugar…
Let the hot chocolate come to a slight simmer, at this point stirring with a wooden spoon, then remove from heat. The beverage should be thicker than regular hot cocoa, but not super thick and heavy (pudding-like.)
Pour into your desired cup or mug…mmm…doesn’t that look decadent?
To add the royal (American)l touch, a dollop of freshly whipped cream and chocolate shavings!


5) Very Decadent Hot Chocolate <This was the winner in Round 1>
Serves 2
Ingredients:
4 oz. dark chocolate, chopped
2 cups whole milk
2 tsp corn starch
about 2 Tbsp sugar
generous pinch sea salt
splash vanilla extract
Directions:
In a small heavy-bottomed saucepan, melt the dark chocolate with a splash of milk over medium-low heat. Stir. Whisk corn starch with rest of milk (vigorously or else you’ll end up with clumps of corn starch in your drink) and slowly add it to the melted chocolate. Add sugar to taste. Keep stirring until it reaches a low simmer and becomes thick enough to coat the back of a spoon. Remove from heat and stir in salt and vanilla.
Divide between two cups.


6) Italian Hot Chocolate
Serves 2
Ingredients
4 oz. dark chocolate, shaved
1 1/2 cups milk
1 tablespoon sugar
3/4 tablespoon cornstarch
1/2 teaspoon vanilla extract
1/2 teaspoon cinnamon
1/8 teaspoon sea salt
whipped cream, optional
Directions
Place shaved chocolate in a small saucepan over low heat and add 2 tablespoons milk and vanilla extract.
Use a wooden spoon to stir chocolate as it begins to melt.
Slowly add remaining milk and continuing stirring until completely smooth.
Add in sugar, cornstarch, cinnamon, and sea salt, and stir until everything is dissolved and combined.
Once mixture boils, let it cook for another 1-2 minutes, or until thickened enough that it coats the back of your spoon.
Pour into 2 mugs  (top with whipped cream if desired) and serve immediately.


7) Melted Hot Cocoa <This was the runner up in Round 2>
INGREDIENTS:
Melted Hot Cocoa
8 Squares (4 ounces) Dark 100% Cocoa Baker's Chocolate
2 Squares (1 ounce) Semi-Sweet Baker's Chocolate
2-4 teaspoons honey, depending on how sweet or bitter you like your chocolate
3/4 Cup Whole Milk, at room temperature 

To make the hot cocoa, melt down the chocolate pieces in the top of a double boiler, stirring constantly. Add the honey and milk and continue stirring until it's one fluid mixture and becomes very warm. Evenly distribute the cocoa between two serving glasses and top with the whipped cream and a pinch of sea salt for garnish. Serve immediately. 

I did all of these together as they all had cornstarch in them.


I did a blind tasting for Husband in sets of 4. He ranked them with Texture, Consistency, Flavor, and Richness to help figure out which he liked best.

I grouped Numbers 2, 4, 5, and 6 together as they all call for Cornstarch and 1, 3, and 7 together. I then did a tasting of 4 with his top two of each group to figure out which one he liked best which were 1, 2, 3, 4, 5, 6, 7 .


AND THE WINNER IS:

***DRUM ROLL PLEASE.............. ***


Number 1!
1) Belgium Hot Chocolate <This was the winner in Round 2>
Ingredients:
2 cups Whole Milk
1 cup Half & Half
4 oz. real Belgium Bittersweet Chocolate 

2 oz. good quality Milk chocolate
1/4 tsp. sea salt
1/2 tsp. ground cinnamon
Method:
Melt chocolate slowly in milk. Add Half & Half. Heat, but do not bring to a boil. Whisk until frothy. Europeans don't have as sweet as tooth as Americans. If needed, add a Tbsp of sugar.


Thursday, February 26, 2015

Back to the Classics: Steakhouse Edition: Cheesecake

Cheesecake is normally a most "sinful" dessert at a Steakhouse so I made this a bit more "house" friendly and made them lower fat.

Low Fat Mini Cheesecakes
For the crust:
1/2 cup finely crushed graham crackers (about 7 graham crackers)
2 Tbsp butter, melted
For the filling:
8 oz low-fat cream cheese
1/4 cup low-fat ricotta cheese
1/4 cup sugar
1/2 tsp vanilla extract
1 orange, zested
1 egg
Directions
Step 1: Preheat the oven to 350° F, and line a muffin tin with liners. Combine crushed graham crackers and melted butter in a small bowl.
Step 2: Tightly pack 1 tsp of the graham cracker mixture into the bottom of each muffin cup, and press down firmly (this will be the crust).
Step 3: Combine the ricotta cheese, cream cheese, vanilla, sugar, orange zest, and egg in a food processor, and blend until smooth. (If you don’t have a food processor, you can do this in a large mixing bowl with a hand mixer.)
Step 4: Put about 2 Tbsp of the cheesecake mixture in each muffin cup (it should fill the cupcake liners about halfway).
Step 5: Bake for 25 minutes, or until the center is almost set (you can put a toothpick in the center of one mini cheesecake and see if it comes out almost completely clean to test this).
Step 6: Cool to room temperature, about 30 minutes. Refrigerate at least 1 hour before serving.
Step 7: Garnish with crushed graham crackers (about 1/4 tsp to 1/2  tsp per mini cheesecake).


Excuse the residue on the pan.
I used a regular size cupcake pan and I did not have enough crust! I would add about 1/4 cup more crumbs and 2.5 tbsp of butter for the crust so that it actually feels like there is a solid base. These turned out pretty well. I like a tart Cheesecake which this was not. The addition of a bit of Sour Cream would not go amiss with me. Next time I will change it up!

Until the next dessert....

Wednesday, February 25, 2015

Back to the Classics: Steakhouse Edition: Chocolate Mouse

One of my favorite memories about Steak and Ale was that I could get Chocolate Mousse there. I remember the first time I tried to make Chocolate Mousse at home, Broder and I managed to ruin a sauce pan as we didn't know what a "double boiler" was at the time. I think that Maman would be much more impressed this time around.

Chocolate Mouse
Ingredients
85g dark chocolate, 70% (I used Green & Black's)
1 tbsp cocoa powder, plus extra for dusting
½ tsp coffee granules
½ tsp vanilla extract
2 egg whites
1 tbsp golden caster sugar
50g full-fat Greek yogurt
handful raspberries, to decorate
Directions
Chop the chocolate very finely and put it into a large bowl that will fit over a pan of simmering water. Mix the cocoa, coffee and vanilla with 2 tbsp cold water, and pour over the chocolate. Place the bowl over the gently simmering water, give it all a stir, then remove from the heat. Leave with the bowl of chocolate still over the water, stirring occasionally to check when melted.
Stir the melted chocolate, it will be quite thick. Stir in 2 tbsp boiling water and the chocolate will immediately thin down and become silky smooth. Leave to cool slightly.
Whisk the egg whites to fairly soft peaks, then whisk in the sugar until thick and glossy. Beat the yogurt into the cooled chocolate. Fold about one-third of the egg whites into the chocolate mix using a large metal spoon, then very gently fold in the rest of the whites until they are evenly mixed in – being careful not to over-mix or you will lose the volume of the mousse. Spoon into 4 small cups or (125-150ml) ramekins and chill for a couple of hours, or overnight.
Place each mousse on a saucer or small plate. Top with a few raspberries, then dust with a little cocoa powder. Will keep for up to 2 days in the fridge.

Mouse? Mousse?
This was super good and WAY easier than I expected. The Greek yogurt adds a tartness that Mousse that, while a little different, added a very nice texture and flavor to a normally overly sweet dessert. If I had had some berries, they would have been perfect garnish for this bad boy.

Until the next dessert...


Wednesday, December 10, 2014

No Bake Yummies: Crunchy Peanut Butter Cups

I wanted to make these bad boys a long time ago. Like back in September is when I found this recipe. but I FINALLY got a mini muffin tin which is what I have been wanting for this project.

Crunchy Peanut Butter Cups
Makes 8
Ingredients:
1/4 cup butter
3/4 cup peanut butter
3/4 cup graham cracker crumbs
1/4 cup sugar
1 cup semisweet or milk chocolate chips
1/4 cup milk
Sea salt
Method:
Line a  muffin tin with papers (you could also use a mini muffin tin if you prefer).
In a microwave safe bowl, melt the butter & peanut butter together for 45 seconds.  Stir until smooth.  Add graham cracker crumbs and sugar and mix to combine.  Distribute mixture evenly between the prepared muffin cups.  Refrigerate for 15 minutes to set peanut butter layer.
After the peanut butter has chilled, combine chocolate and milk in a microwave safe bowl and heat in 25 second intervals until chocolate is just melted. Stir until smooth. Distribute chocolate evenly over the top of the peanut butter layer. Sprinkle with sea salt and chill until firm, at least 30 minutes. Store covered in the fridge.

Here they are finished and in their new home!

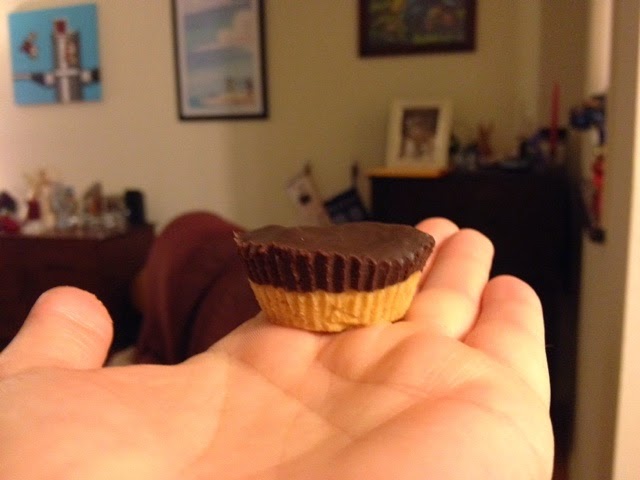
The OH so quintessential side view...to small yet so yum.

Peanut Butter Bottoms


These little ditties weren't too hard at all and as they are no-bake, they kept the house cool during this "heat wave" we had here in LA the early December. It really isn't a heat wave, but I had 6 people in the house and the stove on so it was toasty in the little apartment. I also COMPLETELY forgot to add sea salt. Dang! Whelp, I could let them sit on the counter a while until they soften up again and then apply the salt, but they seem just fine with out in everyone else's opinion.

Until the next easy dessert....

Tuesday, November 25, 2014

Husband's 31st birthday...I am married to an old man.

My Husband is my biggest cooking fan, I think. I do realize that it is directly linked to the fact that he benefits most from my love of cooking, but it is more than that. Yes, he gets to be a fat kid with the delights that I make before anyone else does. Yes, he has only "heated up premade frozen food" <Specifically, the Eggplant Cutlets from Trader Joe's> once since we got married. Yes, he is spoiled rotten thanks to the fact I prefer to be in the kitchen about 4-6 hours a week.

The REAL reason I believe that he is such a big fan is that I take him into consideration. I show my love by making things he would like and as well as inquiring about what interests his palate or not. So for his birthday I asked him what he wanted for his special dinner. It took him a while, but he finally landed on Beef Wellington* and (Whole) Baked Apple Dumplings. I took it a step farther and made a salted caramel sauce to top the apple dumplings with (and thus decided to not use the caramel candies inside the apples).

Here we go!

BEEF WELLINGTON
1 tbsp olive oil (not butter. Butter can burn to easily and this is a nice meal. No burny burn)
1 shallot, minced (you can sub onion, but shallot, though pricey, is worth it for this dish)
¼ lb mushrooms, sliced thin (shiitake are normally called for, but I don't have a refined palate for mushrooms, so I went with white, as that is what I had in my pantry)
1 clove of garlic, minced (don't add extra, trust me and this recipe)
2 8 oz filet mignon steaks (there were no Filets when I went to the store. I should have gone to handy market. 
Salt and Pepper
1 sheet frozen puff pastry, thawed
1 egg, beaten
Instructions
Preheat oven to 400F.
Saute the mushrooms, shallots, garlic, and thyme in the olive oil until mushrooms are cooked.
Lightly flour a large board, and roll out pastry dough until square. Cut in half. Transfer to a baking sheet lined with parchment paper.
Salt and pepper the steaks, then over medium high heat, sear the steaks on all sides.
Place a seared steak on each half of the puff pastry dough. Top with mushroom mixture.
Fold pastry dough over the steak, folding over the edges to seal it. Press the edges down with a fork to make decorate.
Brush egg generously over each wellington.
Bake 20 min. uncovered. Serve immediately.

I served it with Oven Roasted Cauliflower covered in Bechamel. Not healthy, I know.
After searing the meat, let it rest for a bit to let the juices soak back up. 
Roll out the puff pastry so you have enough to wrap up the meat. 
Top with mushroom and shallot mixture.

The egg wash make the dough the pretty golden brown color.
This turned out very nicely except that I don't know how to make it medium versus the well done if came out.

Baked Apple Dumpling Recipe
Ingredients:
4 large granny smith apples, peeled and cored
2 sheets puff pastry, thawed <I used Pie crust. Turned out AWESOME>
1/4 cup brown sugar
2 tablespoons corn starch
1/2 teaspoon ground cinnamon
1/2 teaspoon ground nutmeg
1/4 teaspoon salt
12 caramel candies <I instead mixed brown sugar, cinnamon, nutmeg, and vanilla extract with butter for the core>
2 eggs
1/4 cup granulated sugar
Salted Caramel Sauce for serving
Directions:
Preheat the oven to 400 degrees F. Mix the granulated sugar, corn starch, apple pie spice and salt in a shallow dish.
Cut both pieces of puff pastry in half so you have 4 rectangles. Use a rolling pin to gently roll out any cracks or creases. Then lay them on a large parchment paper lined baking sheet.
Roll 4 peeled and cored apples in the sugar mixture and set one in the middle of each piece of puff pastry.
Unwrap the caramels and stick 3 caramel squares down in the center of each apple.
To wrap each apple, pull the short sides of the puff pastry halfway up the side on the apple and hold them there with one hand. Then lift the longer sides up to the top and pinch the seams together on each side (over the short edges) to completely cover the apple. Pinch the excess puff pastry together at the top to seal, then arrange the flaps in a pretty way.
Then whisk 2 eggs with 2 tablespoons of water and brush the egg wash over each apple. Sprinkle the tops with sugar.
THIS IS THE MOST IMPORTANT STEP... Place the baking sheet with the wrapped apples in the freezer for 15-20 minutes to harden the puff pastry. This will ensure your puff pastry bakes in place and does not sag to the bottom. But don't leave them in the freezer longterm. You don't want the apples to freeze.
Once the puff pastry is hard, place the baking sheet in the oven and bake for 25 minutes, until puffy and golden. Cool for 10 minutes before serving. Drizzle the tops with extra caramel sauce if you like!

Salted Caramel Sauce
Ingredients:
1 1/2 cups granulated sugar
3 tablespoons water
1 1/2 cups heavy cream
6 tablespoons butter
1 teaspoon salt
1 teaspoon vanilla extract
Directions:
Pour the water in a medium heavy-bottom sauce pot. Place over medium heat and add the sugar. Watch closely while the sugar dissolves and darken, 5-10 minutes.
The moment the sugar darkens to your desired color (somewhere between golden-brown and medium brown) remove from the heat and whisk in the heavy cream. *Darker caramels are really flavorful, but don't let the sugar get too dark, or you'll have to start over.
Once the cream is incorporated, stir in the butter, salt and vanilla until smooth. Serve warm, or jar and refrigerate until ready to use.
Not a great color on the caramel sauce, but the flavor was great!

I didn't use the caramels so I added a bit of extra brown sugarness.

Wrapped up all stuff.

Egg wash then patted down with sugar and spice.
Beautiful baked apple!

Carameling...
I needed to let the sugar and water cook longer to get the right color brown. Either way, these turned out GREAT! Both Husband and BROTHER loved them. I will certainly be making these again, but I will half the apple to increase the pie crust to apple ratio.

In summation, a most happy birthday to my partner, my love, my husband. I will continue to cook for you through hard times and good, sickness and health, easy conversations and disagreements, the mundane and holidays, pregnancy and children. Everyday I am capable, I will do my darndest to demonstrate my love (even if that isn't cooking!). Even when we are so old we have no teeth and can't enjoy anything except clear broth, I will continue to make the best dang broth with you in mind.

I love a pun...

Until the next birthday...


*The Beef Wellington choice which is a bonus for me as a lifelong friend, Carol Ward, requested I make this for her education. Seriously y'all, if you need suggestions/want me to make it first so I can share my insights with you, leave a comment or let me know on my Facebook Page! I can't PROMISE that I will make it immediately (or ever, to be honest), but the chances are good that if it piques my interest, I will attempt it when my weekly menu allows it.

Wednesday, November 12, 2014

A party without cake is really just a meeting. - My Mother's would be 70th Birthday

**This post is late because it is in real time**

Today would have been my mother's 70th birthday were she still with us. Though she is not with me physically, I know that those who knew her and loved her, will gladly join my joy in celebrating her memory. A woman of abounding love, energy, and joy. One thing she loved more than most was the French language, cuisine, and culture. So today I decided to make 2 of the best French dishes I know.
Boeuf Bourguignon and Reine De Saba (or Queen of Sheba) aka Chocolate and Almond Cake

< Also, humans landed a man made piece of technology on a comet and my friends released their new invention, so it is a pretty big day all around! >

Boeuf Bourguignon
Ingredients
4 oz bacon, shopped
3 lbs lean stewing beef, cut into 2 inch cubes
1 sliced onion
1 tsp salt
1/4 tsp pepper
2 cups (good quality) Pinot Noir
3 cups low-sodium beef stock
1 tbsp tomato paste
2 cloves garlic, minced
1/2 tsp thyme
1 lb white or Cremini mushrooms
2 tbsp flour (SUB Cornstartch for GF friend)
Directions
In a large pan, heat the olive oil over medium high heat. While the oil is warming up, dry the beef in paper towels. (If the beef is damp, it won't brown!) Gently saute the beef until browned on all sides.
Add the browned beef and bacon to your slow cooker. Add the onion, garlic, salt, pepper, Pinot Noir, Beef Stock, tomato paste, and thyme. Make sure the beef is completely covered (add water if necessary)
Cover and cook on low for 8 -9 hours. With 1.5 hours, remaining, add the mushrooms. I don't add the mushrooms till later in the cooking process, because I like them to be slightly firm.
When the beef is nice and tender, remove the meat and vegetables from your slow cooker and keep warm. To the remaining sauce in your slow cooker, whisk in the 2 Tbsp of flour to thicken.
Pour sauce over meat and vegetables and enjoy!

The easy description is just calling it French Pot Roast.
I didn't follow the traditional recipe for the Boeuf Bourguignon, simply because this cat has to work to bring home the bacon. I figured as this is a slow cooked dish either way, that making it in the slow cooker only hurt the dish a tiny bit. So I went for it and it was well worth it. I browned the meat the night before while watching Parks and Rec and having a glass of "Chef Juice". Then this morning I awoke, cut up the veg, and put all the stuff needed for the first wave into the Crockpot (BEST Wedding present ever THANK YOU, DANA). Poor Husband was in pain the whole day with delicious scents wafting from our kitchen area, but nothing for him to eat yet. Muhahahaha! The Wife's Revenge! I ended up serving it with a small side salad and over potatoes as that is what was available in my kitchen.

After a long day of cooking, the meat was stupid tender and moist, the red wine sauce perfectly flavored and the mushroom, still firm and not that weird, squishy texture. It wasn't too much work, though to thicken the sauce, since I used cornstarch, I put it in a small saucepan and whisked over more direct heat to thicken. This was a great choice and Husband was more than happy to put it in his body. A friend of ours ended up coming for dinner, I left out the Bacon and Flour as she is allergic to pork and gluten. She loved it as well so I thinking this is a win win meal!


Juicy and meaty.


Reine De Saba (or Queen of Sheba) aka Chocolate and Almond Cake
Ingredients
4 oz semi-sweet chocolate melted with 2 tablespoon of rum or coffee
1/4 lb. or 1 stick softened butter
2/3 cup granulated sugar
3 eggs (separated)
pinch of salt
1tbsp caster sugar
1/3 cup pulverized almonds (I used almond meal)
1/4 tsp almond extract
1/2 cup cake flour
Method
Preheat the oven to 175 degree celcius (350 degrees Fahrenheit), butter and flour a 8 inch springform cake tin. Set the chocolate and rum or coffee in a small pan over simmering watering; let melt.
cream the butter and sugar together until pale yellow and fluffy.
Beat in the egg yolks one at a time until well blended.
Beat the egg whites and salt in separate bowl until soft peaks, sprinkle on a tablespoon of sugar and Beat until stiff peaks are formed.
Use a rubber spatula, blend the melted chocolate into the butter and sugar mixture, then stir in the almonds and almond extract. Immediately stir in one fourth of the egg white to lighten the batter. Delicately fold in a third of the remaining whites and when partially blended, sift on one third of the flour and continue folding. Alternate rapidly with more egg white and more flour until all are incorporated.
Turn the batter into the cake pan, spread the batter all over and well level with a spatula. Put in the oven and bake in middle level for about 25 minutes.
Cake is done when it has puffed, and 2½ to 3 inches around the circumference are set so that a skewer plunged into that area comes out clean; the center should move slightly if the pan is shaken, and the skewer comes out oily.
Allow cake to cool in the pan for 10 minutes. Run a knife around the edge of the pan, and reverse cake on the rack. Allow it to cool for an hour or two; it must be thoroughly cold if it is to be iced.
(Optional) Try and sprinkle with some sea salt on top before serving. <which I did>

The cake stand belonged to my Mother's mother. Generations!
Riene De Saba is a nearly flourless cake that is pretty much amazeballs. I have never made it before today, but have had several times in the past, at restaurants and made by my mother when she was living. I have seen it iced with a butter cream frosting from time to time, but I personally think that doing so is overkill. It is like trying to make oatmeal cry, why would you do it? This cake is spectacularly moist and dense without feeling like you are getting smacked in the mouth with Cacao.

So I made this cake in a 9 inch spring foam, as that is what I have in my cabinet, and I baked it for 20 minutes instead of 25 with a solid 15 cool time in the pan. oh man...words can't explain how good this cake is in my mouth. I am happy I didn't opt for frosting the cake as the cracked sea salt over the top was bomb.com. Even our friend who shouldn't do the gluten, did a little bit of gluten.

Make this. Make your life better.
You might notice the small cordial glass. That is filled with a dessert wine I got when I went to Callaway Winery in Temecula years ago and opened tonight in honor of 70 years. The wine is a late harvest Chenin Blanc and is called Sweet Nancy. Suiting, isn't it? While I think a late harvest Cabernet Sauvignon would have paired better, but it it would not have been called Sweet Nancy.

I think this is a valid tribute to my mother. No, it isn't a theatre named after her or a festival that she headed up to create, but it is reminds me of my mom. I figure it works.


Wednesday, October 29, 2014

We all scream for Ice Cream (unless you are lactose intolerant)!

I made ice cream for the first time. I made it a couple times, so now I share with you what I have learned from these two different recipes:

Ingredients
2 cups heavy cream
2 cups whole milk
3/4 cup sugar
2 teaspoons vanilla
Pinch salt
Good quality chocolate, for garnish
Directions
Whisk all ingredients together until sugar dissolves. Pour into the bowl of an ice cream machine. Freeze according to the manufacturer's instructions. After the ice cream is made, transfer to an airtight container. Cover tightly and freeze until ready to serve. When ready to serve, make chocolate curls using a vegetable peeler. Serve ice cream garnished with curls.


This turned into a much more like Creamed Ice versus a Ice cream. I was like a sorbet of milk versus a lovely creamy dessert. It did the job well when paired with a brownie, but it wasn't worth keeping after the baked good were gone.

And I also tried out:
(yields 1 quart)
1 1/2 cups heavy whipping cream
1 1/4 cups whole milk 
1/2 cup + 1 tbl dark brown sugar
1 1/2 cups whole coffee beans
3 egg yolks
1/4 cup + 2 tbl Irish whiskey
1 tsp vanilla extract
1 tbl dark chocolate flakes
DIRECTIONS:
1. In a medium saucepan, heat heavy whipping cream, whole milk, and dark brown sugar over medium heat, stirring frequently until mixture starts to simmer. Pour in coffee beans, stir, remove from heat, and let sit for an hour. 
2. After an hour, reheat the mixture on medium heat. While the mixture is heating, whisk the egg yolks with the whiskey and the vanilla extract. Once the cream and milk starts to simmer, take a tablespoon of the mixture and pour it in with the egg yolks to slowly warm them up. Stir quickly. Add a few more tablespoons, one at a time, stirring constantly. Pour the heated egg yolks in with the milk and cream. Remove the saucepan from heat and stir for about 30 seconds. 
3. Let the mixture cool for about 30 minutes. Put in a container with plastic wrap right over the custard. Place in the fridge to ripen, preferably for at least eight hours.
4. Pour it into an ice cream maker and churn according to manufacturer's instructions. When ice cream is ready, scoop out and garnish with a dollop of homemade whipped cream and dark chocolate flakes. 


This one has the addition of egg yolks, heat, and a "ripening" period. This one has the better texture and consistency EXCEPT that I ground the coffee. I thought that it would blend seamlessly slip into the ice cream. I was wrong. While it doesn't bother Husband or most of my friends, I can't stand the texture of the ground coffee. Next time, I will make this with whole beans or Starbuck Via.

A note of warning though...use decaf if caffeine messes with you like it does me.

Until the next nom nom...